When I first started painting on silk the exciting possibilities of the medium inspired me. I was hooked! I
constructed a simple wooden frame, bought some silk paints and a metre of silk
and made a start. Later I purchased a wax pot to use batik techniques in some
of my paintings. For most of my work I use the technique called sequential
gutta work with layered painting but I prefer to call it silk painting using
“hidden” gutta lines.
Most silk painters are familiar with the gutta technique to outline a design on silk and
to separate areas that are to be painted with different coloured dyes or silk
paints. The outliner acts as a barrier or resist to the dyes or silk paints.
The substance used as the outliner resist in silk painting is generally
referred to as ‘gutta’. To be precise it is not gutta percha, the sap from a
Malayan tree, but a modern substitute sold as outliner medium for silk
painting. However it is common practice among silk painters to refer to the
outliner as gutta and I do so in this handbook.
Gutta comes in two forms, clear and coloured. It can be applied to the silk from a tube, from a
small plastic bottle fitted with a nib or with a brush. Clear gutta can be
removed from the silk once the painting is completed and is the basis of the
“hidden” gutta line technique.
Water-soluble clear gutta is mainly used with iron-fixed paints and is washed out once the paints have been
fixed. Solvent-based clear gutta is mainly used with steam-fixed silk dyes and once
the dyes are fixed must be removed chemically. Coloured gutta is permanent and
comes in a range of pearl and metallic colours. It can be applied like clear
gutta or thinned with water, silk paint or dye and painted onto the silk with a
brush.
Outlines of gutta are usually applied to the silk before painting commences and when the silk painting is
finished these outlines remain visible. If a soluble clear gutta was used, when
it is removed the outlines remain the original colour of the silk. If permanent
coloured gutta was used the lines will obviously be the colour of that
particular gutta.
Clear gutta can also be used in the same way that wax is used in batik
 to build up a series of resist lines
that conserve areas of previously painted silk before more paint or dye layers are
applied. This is the basis of the “hidden” gutta line technique. Soluble clear
gutta applied over previously painted silk will leave no indication that it was
there when the painting is finished and the gutta is removed.
to build up a series of resist lines
that conserve areas of previously painted silk before more paint or dye layers are
applied. This is the basis of the “hidden” gutta line technique. Soluble clear
gutta applied over previously painted silk will leave no indication that it was
there when the painting is finished and the gutta is removed.
The technique can be used with steam-fixed silk dyes but the
colours are more difficult to build up in layers because unfixed dyes will move
when they are covered with subsequent applications of clear gutta or made wet
again with water or dye. Nevertheless moving dyes up towards clear gutta lines
using water can create some interesting shading effects.
The most satisfactory results are obtained using iron-fixed silk paints.
When thoroughly dried with a hair dryer the paint is fixed and will not be
moved by the next application of clear gutta or layer of paint. Iron-fixed
paints are also slightly opaque which helps to cover the under-layers of paint.
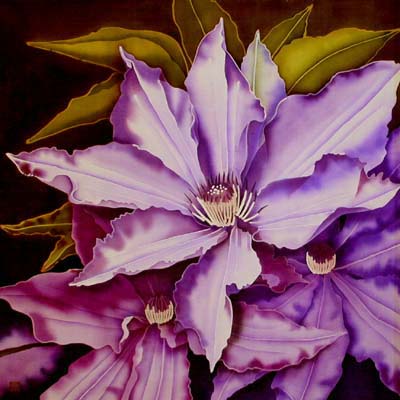
3. Clematis - The President" The finished silk painting 36cm x 36cm
A USEFUL TIP
Water-soluble clear gutta should not be applied to damp silk unless you want it to spread on the surface.
Silk: There are many types of silk used in silk painting but the type I use for the "Hidden"
Gutta Technique is:
Habutai medium - a smooth medium weight silk
Paints: I use Pebeo Setasilk iron-fixed silk paints and the colours I recommend are:
Two reds - violet/red (Magenta) and orange/red (Coral)
Two yellows - (Buttercup) and yellow-ochre (Old Gold)
Two blues - violet/blue (Iris violet) and green/blue (Cyan)
From these colours you will be able to mix all the other colours you need. However I
also find that green (Meadow Green), brown (Cinnamon) and black (Ebony) are very
useful because they make it easier to mix a wider range of shades and tones.
Brushes: I use sable/synthetic mixture round watercolour brushes sizes 4, 6 and 8 for painting and a
medium sized sponge brush for wetting large areas of silk.
Clear Water-soluble Gutta: I use clear water-soluble gutta applied from a tube or from a small plastic
bottle fitted with a 0.5mm gutta nib to outline the painting area.
Permanent Gutta: Permanent gutta is available in several colours both metallic and pearlized. It can be applied
in the same way as water-soluble gutta or mixed with a little water or silk paint and applied to the silk
with a brush. It can be used as a resist or to add highlights to a near completed painting.
Painting Frame: A simple wooden frame can be made from four lengths of 30mm x 18 mm softwood, glued
and screwed together. Cover the wood with strips of masking tape to keep the wood clean.
A square frame made from four 28cm lengths will hold a piece of silk 30cm square.
This is the size I use to paint the silk for the lids of boxes. Nine squares of silk this size can be cut
from a metre of silk 1 yard (91cm) wide.
Straight edge: A length of the same timber used for making frames can be used when drawing straight gutta
lines.
Pins: Three-pointed silk pins are used to hold the stretched silk onto the frame.
These should be placed opposite each other to ensure an even tension in the silk.
Palettes: Plastic palettes with several deep wells are best to hold the liquid paints.
Pipettes: Small plastic pipettes are used to add water to paints in the palette.
Wax Pot: An electric wax pot is useful to melt batik wax to use as a resist or to produce a crackled
texture.
Stencils: Stencils can be cut from drafting film or sheets of acetate -
overhead projector film is ideal.
Cutting Stencils: A craft knife or scalpel can be used to cut stencils however, a thermostatically
controlled electrically heated stencil cutter shortens the time taken to cut acetate stencils. The cutter
resembles a soldering iron with a fine pointed cutting tool. As the acetate melts an edge is raise where
the cut is made. This can be removed with an emery-board.
Salt: Different types of household salt can be used for the salt effect but do not
spend a lot of money buying special silk salt because dishwasher salt works just
as well and is much cheaper.
Other materials and equipment: Scissors, a hairdryer, an electric iron, a small pot for clean water
and a larger water pot to rinse brushes, paper kitchen towel, paper tissues and cotton
wool buds.
Preparing the Silk: Stretch and pin a piece of silk onto a wooden frame. Start by pinning one edge
using a pin every 5cm. Then stretch and pin the opposite edge of the silk and
finally the two remaining edges. Draw a line of gutta on the silk around
the inner edge of the frame. Use a straight edge or a ruler to keep the line
straight. This is optional but a gutta border will contain your painting and
also stop the colour from spreading onto the frame thus keeping it clean. Dry
the gutta lines with a hairdryer.